 So in between Nutcracker performances and doctor visits this has been the candy weekend. I have been trying to get all my candy made this weekend so I can package it up all cute to give away in the next week. This is one of our favorites and it is so easy you won't believe how yummy it is. This is all you need: a package of candy canes, I think there are 12 in there, a package of white chocolate chips and about 2/3 of a cup of semi-sweet or milk chocolate chips depending on your preference
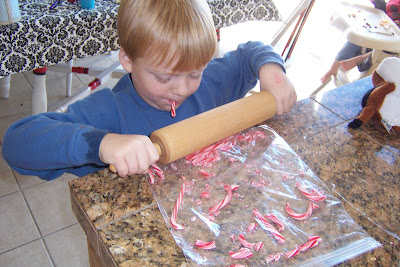
This is great candy to make if you have little helpers around like me. Brittany is unwrapping the candy canes(while her hair is trying to think curly thoughts for the Nutcracker), Matthew is crushing the candy canes after they were put in a freezer bag, and Joshua is of course, eating one of the candy canes. This recipe is nearly perfect, but its flaw is the mess that is somehow required while making it. Even when I have made it without kids it is really messy. But trust me, it is worth it!
Great concentration is required for the crushing!
Once your candy canes have been pulverized into a fairly fine powder it is time to melt the chocolate. Empty your whole bag into a glass bowl and microwave one minute at a time at 50 percent power. Stir after each minute. After about 3 or 4 minutes it should be melted and smooth.

Add the crushed candy cane and a few drops of food coloring. My kids have an ongoing debate about whether pink or green tastes better! Mix it all together and then spread it on a cookie sheet lined with aluminum foil. It is actually better to line your cookie sheet before you start any of this because you do need to work quickly or the chocolate will cool.

Then take the milk or semi-sweet chips and melt them the same way. Drizzle over the top and then run a knife through to make it look pretty. If you skip this stage it will still look pretty but will look unappealingly like barf. If you live where it is cool just stick it outside to set up, if not the refrigerator works. When it is cold and hard you just peel it off the aluminum foil and break into small pieces. I promise if you give this as a gift or take it to a party people will love you! And the best part is it is done start to finish in about 30 minutes and costs about $ 3 a batch! Let me know if you try any--and if you think pink or green tastes best!


10 comments:
This looks yummy
Alison
Cool! I'm going to try that, because you have given it to me and it rocks! I know pink tastes better. How could green taste better? It's not as cute! I'm right there with you on the curlers. Tonight I did g and R because R thought it loked fun. I'm getting faster!
Ok so I did it, but I still think it taste better coming from you. I gave it away so I couldn't eat it all. Thanks
Can't wait to try this! Also, I'm looking forward to the Nutcracker photos. Good luck with that! Hope you are enjoying your holiday.
SO funny Michelle! I spent all afternoon making this! It's my staple gift every year for bus drivers, teachers, co-workers of my hubby's...it is the most delicious stuff and makes such a pretty gift!! xoxoxo
Ooooh, this looks good. I think I'll try it out next weekend. Thanks.
LOL Looks like a good time was had by all!
Wow! This looks just delish! I love that picture of Matthew. He's so cute making candy with a candy cane in his mouth!
candy canes are my favourite christmas time food so I think I must find time to make this! no hurry though becuase there are always candy canes on sale after christmas too. yummy!
Your Christmas candy is the best!!!!!!!!!! Thank you for the yummy candy you sent. I am really missing the rest of your candy this year. I hope to find the time and energy to try this recipe. I would love to have all of your candy recipes!
Post a Comment